Categories: Advanced
Features and Goals of This Project
- Identifying visitors using
facial recognition
and
Open
CV
- Rapid computation
, decision and taking action on the decision
- Opening the door for known visitors using
motor control
- Welcoming visitors with a voice created using
text to speech
synthesizer
- Motion detection
to open the door for a person approaching from inside
We needed a good Linux platform that is portable and small enough to be mounted on the door. The platform also needed to have enough power to run OpenCV to process and recognize captured images on the go. Wireless capability would be an added bonus.
BeagleBoard.org
BeagleBone Black Wireless powered by OSD335x perfectly matched our needs.
The inspiration and personal history behind the project is told by Eshtaartha
Basu on the Octavo Systems blog site.
Read about it here.
Let’s
dive
into
the
project!
Overview of Hardware Used for the Project
BeagleBone Black Wireless
The
BeagleBone Black Wireless
keeps the form and function of the original
BeagleBone Black
and adds new features. Replacing the 10/100 Ethernet port with onboard 802.11 b/g/n 2.4GHz WiFi and Bluetooth, the popular open source computer now comes with built-in wireless networking capability. Leveraging a partnership with
Octavo Systems
and designed in CadSoft Eagle, BeagleBone Black Wireless is the easiest to use and modify credit-card sized IoT Linux computer available.
Camera & OpenCV Software Modules
We used OpenCV for Face Detection & Recognition
For our project we are capturing the images using a Logitech HD 1080p camera. Those images are being evaluated directly on the BeagleBone Black Wireless to determine a visitor’s identity. We want open the door only for our colleagues here at the Octavo System offices and ask others to wait for someone to open the door. We are using
Open Source Computer Vision (OpenCV) Haar Cascades algorithm
for Frontal Face Detection and
Fisher Face Recognizer
for Face Recognition.
We had to feed a lot of pictures to train the Face recognizer. This was a chance for all our colleagues to give a lot of funny expressions.
More explanation of the the openCV libraries is available on their website.
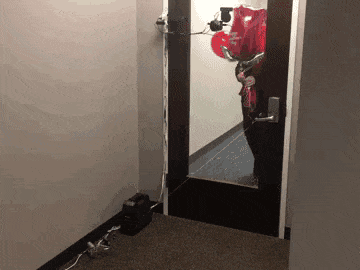
Motor Mechanical System Operation and Control
After the Camera or Motion Sensor recognizes someone approaching and makes a match, it is time to open the door. This portion of the project was fun and took quite a bit of problem solving since
we could not alter the office door, door handle, floor or wall.
We took a look at the surrounding area and focused on the door stop as a great place to make a sturdy fixture to host the motor control portion of the project.
For this we needed a motor driver to receive commands from the BeagleBone Black Wireless and control a suitable motor.
Motor Driver Module
For the motor driver, we chose the
MTD-01 module from OSEPP
which was readily available at Frys.
- Can drive a 4-wire stepper motors, or two DC motors simultaneously
- L298 dual h bridge driver
- Reverse motor polarity (motor direction)
Note: The driver comes with a 5v linear regulator supply. The 5v supply is enabled with a jumper. If your motor supply is higher than 12v it’s recommended that you remove the jumper and use an external supply. See a description of the one we chose below. The 5V supply is enabled with a Jumper
Motor
After trying a few motors, we chose a
Geared DC Motor with 118RPM @ 12V
for the torque needed to pull down on the handle and open our office door.
We attached a
Bore Set-Screw Hub
and long screws to host the metal wire rope which we attached to the door handle. This set up prevented us from altering or damaging the door handle in any way – an important aspect of our project.
We found
Actobotics Channel
very useful and versatile for use in many of our projects. We attached a three sided 6 inch piece to the door stop using it’s existing screw mount. To this base we attached the motor and also a 1/4" stainless steel spring snap link to help guide the metal wire connected to the door handle.
We also found that a piece of Actobotics channel would work well to guide and maintain correct position of the the wire as it opens and closes the door. Your door set up will be unique, of course, and we hope that these versatile mechanical parts give you inspiration for your situation.
Power Adapter
12-VOLT DC 3000mA POWER ADAPTER by Rhino made a great off-the-shelf choice for power management of our motor system. Turn the dial to set it to 12V output at 3000mA.
Additional features:
- Short circuit protection(SCP): self-protection against short circuit.
- Selectable DC-VOLTAGE Output
- Selectable Multi-Output plugs for many popular devices
- CORRECT POLARITY MUST BE OBSERVED
- LED Power Indicator
Voice Output Using Flite Text to Speech Synthesizer
To enhance the project further, we added a text to speech capability to announce the identification of the visitor. We used a Sabrent USB 2.0 External 2.1 Surround Sound Adapter. This a highly flexible audio interface, and since it can be used with any PC O/S, it was easy to adjust to work in our Linux environment.
Once the program identifies the visitor and communicates to the motor control, it uses "Flite" Text to Speech synthesizer to produce sound output via the sound adapter card and speaker . A library of known visitors is loaded into the software and the appropriate name is included in the greeting. For an unknown visitor, the door of course, will not open. Therefore the Text to Speech synthesizer will provide a pleasant greeting asking the visitor to wait for someone to answer the door.
Motion Detection Using A Pyroelectric Sensor
Providing additional functionality to open the door for known visitors to leave the office was easy to add to the project thanks to the Mikroelectronika selection of Click boards.
MOTION click
is a motion detector sensitive only to live bodies. It carries
PIR500B,
a pyroelectric sensor. The click is designed to run on 3.3V power supply only. It communicates with the target processor over RST and INT pin on the mikroBUS™ line.
The sensor generates a voltage when exposed to infrared radiation emitted by live bodies (the white plastic Fresnel lens covering the sensor filters visible light). The signal is processed by a
BISS0001 PIR
sensor controller which sends an interrupt to the MCU through the mikroBUS INT (out) line.
Connecting Everything
This section will be updated soon ….
Software and Code Instructions to Make it Run
Overview:
The objective of this project is to automate any office/home door(preinstalled with door closer).
The project uses OpenCV Fisher Face Recognizer to recognize the face of people who are trying to enter the room.
A geared DC Motor is used to actually open the door. A motion click is used to detect indoor motion and open the
door for anyone trying to leave the room. "Flite" voice synthesizer is used to output suitable greeting messages.
Procedure to build OpenCV and run the project code on BeagleBone Black Wireless:
1. Get the latest Debian image from
https://beagleboard.org/latest-images
2. Burn the image to an SD card (minimum 8GB required for this project) using the instructions from:
https://beagleboard.org/getting-started#update
3. Expand the File System of your SD card from 4GB to 8GB using the instructions from (See Note below):
http://dev.iachieved.it/iachievedit/expanding-your-beaglebone-microsd-filesystem/
NOTE: In step 6 of the above link, set the First Sector to 8192 instead of leaving it blank
4. Copy the given files (installScript.sh, getTrainingData.py, trainAndPredict.py, haarcascade_frontalface_default.xml) to the same directory on your BeagleBone Black Wireless.
5. Make the install script executable:
sudo chmod +x installScript.sh
6. Run
installScript.sh
sudo ./installScript.sh
The script will install all the necessary dependencies and download OpenCV 3.1.0.
A few issues were found during the build process of OpenCV. Hence, the last 7 lines of this script (installScript.sh) were intentionally commented to prevent the build process of OpenCV. To avoid possible issues during build, apply the following fixes:
a. To resolve hdf5.h error:
Open common.cmake:
nano opencv-3.1.0/modules/python/common.cmake
Copy and paste the following lines at the end of common.cmake:
find_package(HDF5)

include_directories(${HDF5_INCLUDE_DIRS})
Save and close the file.
b. OpenCV "predict confidence" wrapper workaround:
Navigate to line 259 of face.hpp
nano opencv_contrib/modules/face/include/opencv2/face.hpp
Replace the line with:
int predict(InputArray src) const;
Save and close the file.
7. Uncomment the last 7 lines of installScript.sh and rerun the script. The OpenCV build process may take 6 to 10 hours to complete.
8. The face recognizer needs at least 2 sets of pictures to train on.
Run getTrainingData.py:
python getTrainingData.py <name of the person in front of the camera>
Example:
python getTrainingData.py John
Once the script starts running, the camera will turn on and you will be able to see "Camera on" message on the console.
Stand right in front of the camera. Once a face is captured, "Face captured" message is displayed on console. A count of number of pictures captured is also displayed. At least 100 pictures per person is necessary to get good prediction.
9. At this point, the Face Recognizer should be ready to Train on the available images and then make Predictions.
Run trainAndPredict.py:
python trainAndPredict.py
The script will display messages on the console as it goes through different phases of training.
10. Once "Face Recognition in progress" message is displayed on terminal, the Face Recognizer will be able to predict the name of the people standing in front of the camera.
What’s Next?
We hope you enjoy the project and join us in relieving stress by building your next project with OSD335x System-In-Package. Stay tuned for future write ups and enhancements to this project. With all of the capability available via the OSD3358 on the BeagleBone Black Wireless, Eshtaartha is sure to come up with some new features.
We’d love to hear about your next design and discuss how OSD3358 SiP can help. Please contact our engineers directly and let us show you the ways working with System-In-Package can relieve your stress and give you more time to do the fun parts of your product development.
Comments are not currently available for this post.