Categories: Intermediate
void main(){

  Robot4(Humans);

}
After assembling the robot, you should be able to program it using the BluPants
Studio
. Watch the video and check out how learning to code can be fun and easy.
The video shows lessons 1 and 2 from BluPants coding class. Find more lessons
here
. Other than the basic drag and drop coding blocks shown, it also natively supports Python and advanced coding blocks set. For more information about BluPants visit
www.blupants.com
or watch our
Intro to BluPants
video.
In order to get a robot similar to the video, you will need to complete all the 4 tutorials in the BluPants robots series:
- Build a base/MVP robot (this tutorial)
- Add a claw/gripper to the base robot (find the
claw tutorial here
) - Add a distance sensor (find the
distance sensor tutorial here
) - Add a camera to the robot (find the
camera tutorial here
)
It is up to you how many extra gadgets you want to add to your bot. But regardless whether or not you add more things to it, keep in mind that the basic/MVP robot is already a very good start for learning how to code. Let’s see how you can start creating your own Beaglebone robot and learn to code with BluPants.
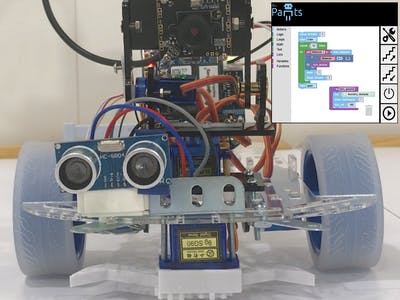
Parts (Basic Robot)
The basic robot is the minimum viable product (MVP) that can be used with BluPants. It will only navigate in all directions (forward, backwards, turn left and turn right). It is the bare bone you will use to build more sophisticated bots in the future.
It is recommended to assemble the MVP first, and add extra features later (distance sensor, gripper claw, camera, extra servos, etc) as you get more experienced. The parts for the extra features are marked as "optional" on the "Things used in this project" section.
For the basic MVP robot, we are going to need the parts bellow:
Now that we know what we need, we have only one more thing to do before going to the actual assembling: check the motors polarity.
Motor Polarity
The polarity of the motors and how we attach them to the chassis will define whether the robot will move forward or backward when power is provided. It is very important to make sure you figure out the motors polarity/direction properly, before soldering the wires.
In order to do that, download the
BluPants image
file available on this
link
and flash it to a micro SD card (4G minimum). We want to make sure that the forward command will make the wheels spin in the correct direction and make the robot move the way we want.
You may refer to the official
BeagleBoard page
, or to this
video
for instructions on how to flash an SD card using
Balena Etcher
. Regardless the documentation you use, just make sure you flash the correct
BluPants image
file to your SD card.
Connecting the motors to your Beaglebone
Once you have your SD card ready with the latest BluPants image, power off your Beaglebone Blue, and insert the card to the board as shown bellow.
Attach the JST connectors to the DC motor driver 1 and 2 on the board.
DC motor driver 1 will be connected to the left motor, and the driver 2 to the right motor.
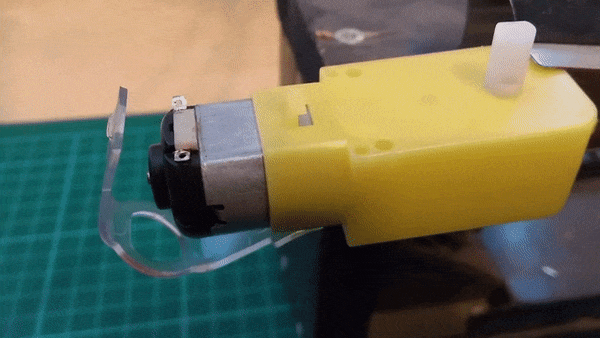
Now, connect the wires to the motors, but no soldering yet. You may need to invert the cables to revert the polarity in the case the wheels spin in the wrong direction. For now, just make sure you have a good physical connection between the wires and the motors.
Mark your motors as left (connected to driver 1) and right (connected to driver 2). Define the forward direction to the opposed end where you connected the wires, as shown on the picture bellow:
Now connect the battery, and power on your Beaglebone.
Wait for the Beaglebone to completely boot, and connect it to your WiFi network. If it is the very first time you boot it with the BluPants image, you will need to manually connect it to the WiFi. In order to setup your WiFi network properly, please refer to the official BeagleBoard documentation:
Enable network connection
, then setup
WiFi connection
.
Checking the motor polarity/direction
Once you have your Beaglebone connected to the WiFi, open a browser and visit
http://blupants.org
. Make sure the computer you are using to browse is also connected to the same WiFi network you connected your Beaglebone.
On the "Robot" drop-down menu (bottom right), select the WiFi IP address of your Beaglebone and click "Play":
In this example the Beaglebone WiFi address is "10.0.0.119". If you cannot see any IP address try reloading the page, or opening and closing the browser. If you still can’t connect, please refer to "Troubleshooting BluPants connection" section.
Now that you are connected, drag and drop one or two "move forward" command blocks, and click "Play" to execute it.
Watch the two motors, and make sure they move to the "forward" direction.
If the motors do not run on the desired direction as shown on the video, invert the red and black wires connection to revert the polarity and run the test again.
Once you confirm the connections are good, you can go ahead with the soldering.
Now that we have our motors and wires
soldered
, and have already defined left, right motors, and forward direction, let’s start assembling our robot!
Assembling the robot
Turn off your Beaglebone and disconnect the battery. Get the chassis, and put it on the top of the motors with the exact setup we currently have on our table:
Hold the motors to the chassis and flip it. Notice that the letter "L" and "R" will no longer be visible because the chassis is attached to the motor on the same surface we had written the letters.
After flipping the chassis, put the other two external fasteners close to the motors and use the bolts to fix them. The bolts should come from the outside to the inside. The nuts should be attached from the inside of the chassis.
Bring the JST connectors to the top of the chassis.
Connect the two motor wheels and install the swivel wheel to the back of the chassis.
With the chassis ready, connect the JST connectors to the motor drivers (left JST to the driver 1 and right JST to the motor driver number 2). Then connect the battery, and power on your Beaglebone.
Wait for the Beaglebone to boot, open
http://blupants.org
on your web browser and you are ready to start coding with your new robot!
As you noticed on the video, our MVP robot may require some tuning. Check out the next section for more details.
Tuning BluPants robot
For a better performance and more accuracy, it is strongly recommended that you tune the BluPants robot for your environment. But, before doing that, make sure you have a proper weight distribution and have the parts on the top of the chassis well fixed to it.
At the end of the
video
we notice the robot slip when performing the turn to the right because the battery and the Beaglebone board were not attached to the chassis at all. As the battery and the Begaleboard move during the turn, the robot oversteered to the right. So before attempting to tune it, make sure your robot is steady and does not have any loosely attached part.
For tuning and customization, you need to edit the file "/root/blupants.json" on your Beaglebone. The
blupants.json
file will be reloaded every time you click the play button and execute your code.
For instance, you may want the robot to move further when executing the "move_forward()" command. For that, all you need to do is to increase the default value of
"block_length": 0.5,
to something like
"block_length": 0.9,
Or maybe you want the robot to go slower by applying a factor to the duty cycle (by default it uses half of the dc). Change the current value from
"duty": 0.5,
to something like
"duty": 0.3,
You can also compensate physical issues such as one motor running faster than the other (which prevents the robot from moving straight).
Let’s say you want you motor 2 (the motor on the right) to run 20% slower. In order to do that, you change the second value of the duty_ratio from 1.0 to 0.8.
Original setup:
"beagleboneblue":

{

  "motor":

  {

    "duty_ratio": [1.0, 1.0, 1.0, 1.0],

  }

}
Setup with motor on the right running 20% slower:
"beagleboneblue":

{

  "motor":

  {

    "duty_ratio": [1.0, 0.8, 1.0, 1.0],

  }

}
Feel free to edit the file and test your code until you get the accuracy you are looking for. If for some reason, you break the json file and the robot no longer works, just download the original copy from
github
.
wget https://raw.githubusercontent.com/blupants/blupants/master/src/python/blupants/blupants.json
You may need to restart the service after restoring a broken
blupants.json
file. For restarting the service, open a command prompt, then run:
sudo service blupants restart
Feel free to add any comments to this article if you need any further help.
Troubleshooting BluPants connection
If you cannot connect your browser to your Beaglebone, make sure your BluPants service is running. Login to your Beaglebone (default credentials are user:
root
, password:
temppwd
) and open a command prompt. Then run the command:
sudo service blupants status
The expected result should be something like this:
If you need to restart your service, you can try:
sudo service blupants restart
And check the status again. Once you confirm the service is running properly, visit
http://blupants.org
on your browser and try to connect to your Beaglebone again.
Alternatively, you can try to provide your Beaglebone WiFi IP address directly on the URL. In order to manually get your WiFi IP address, run the following command from your Beaglebone command shell:
ifconfig wlan0
You should get something similar to this:
The IP address is shown on the third line (inet) as "10.0.0.119". Your IP will very likely be different. Now that we know our IP address, we can use it directly on our browser URL like this:
http://blupants.org/?robot_ip=10.0.0.119
Make sure you replace "10.0.0.119" by your own IP address and paste it to your browser address bar. Open the page and click the "Play" button to connect.
If you need any further help, please add any comments to this article, and we will provide you assistance.
What’s next?
Stay tuned for more tutorials, so you can expand your basic robot. For instance, we have a tutorial available on how to
add a claw to your robot
and another one for
adding a distance sensor to Beaglebone Blue
. The distance sensor is completely compatible with the robot we created today. Feel free to follow the instructions from the other tutorial and perform expansions to your basic MVP robot.
In the future we will be covering topics such as adding a camera with pan and tilt servos, adding a gripper claw, text to speech, computer vision with OpenCV 4, etc. All those things are already natively included in the BluPants image you just flashed to your micro SD card today.
You may want to explore it further and try new things yourself. If you feel it, check out all the parts we marked as optional on this tutorial and try building more stuff yourself. BluPants is a platform designed to allow you to learn by doing.
If you want to drop us a line, please feel free to add comments and/or reach out to us directly. Follow us on
Twitter
to stay tuned with all new releases
See you next time!
Robot4()

{

  return Humans++;

}
Thank you note
The BluPants image is based on the open source project
Beagleboard
. We would like to thank all the Begaleboard community for the amazing and high quality open source hardware platform you support. If you want learn more about Beagleboard, please visit:
https://beagleboard.org
.
Comments are not currently available for this post.