Categories: Intermediate
Introduction to the eduMIP and DSTR Robots
The educational Mobile Inverted Pendulum is an exciting robotics kit developed by the
UC San Diego Coordinated Robotics Lab
. The eduMIP kit (available
here
) includes all mechanical components for building the robot:
- a robust wheelbase with motors/gearboxes/wheels/encoders/wires,
- the vehicle chassis and bumpers,
- a 2-cell 1400 mAh LiPo with custom wire harness, and
- a 12 volt charger.
However, the user will have to buy their own board for the eduMIP, and it can be run using:
- The BeagleBone Blue, or
- The BeagleBone Black Wireless with the Robotics Cape
The
Digital Systems Teaching and Research
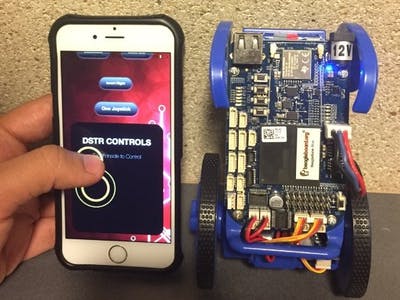
(DSTR) robot was designed and built at Texas A&M University. While you can read more about the project, we will be using the "DSTR" app available on the iPhone to control the eduMIP through WiFi.
Step 1: Setting Up the eduMIP
In order to build the eduMIP from the kit, access instructions
here
and if you’re using the BeagleBone Blue,
this
video might be helpful. Follow the instructions in the BeagleBone Blue DSTR Setup Guide attachment to etch the DSTR image, found
here
. Once the eduMIP has been assembled with the correct image, install the
Robotics Cape library
from Strawson Design into your cloud9 directory. At this point, you should be able to make the main file and then run rc_balance from the /examples/bin path within your Robotics Cape directory to see the eduMIP perform its self-balancing program.
Step 2: Setting Up the DSTR App
First, download the "DSTR" app from the Apple App Store. Next, download the "DSTR.py" python3 file given as an attachment below. Place it in your directory, keeping in mind that the location of DSTR.py will be used later on while programming the balance controller for the eduMIP.
In order to interface between DSTR.py and the BeagleBone Blue, your cell phone will have to be connected to the BeagleBone Blue wifi (password: "dstrdstr"). Once the cell phone is connected, navigate to the "DSTR" app and within the app, navigate to "DSTR WI-FI Controller" and choose "One Joystick". While in this setup, you can run DSTR.py with debugging code uncommented (indicated in the python code) under the if statements in order to make sure that the connection is working. The terminal should print text corresponding to which direction is being triggered.
if int(data[0])==170 and int(data[2]) == 170 and data[1]<50 and data[3]<50:

    f = open("up.txt","w+")

    # print("up")

if int(data[0])==187 and int(data[2]) == 187 and data[1]<50 and data[3]<50:

    f = open("down.txt","w+")

    # print("down")

if int(data[0])==170 and int(data[2]) == 187 and data[1]<50 and data[3]<50:

    f = open("right.txt","w+")

    # print("right")

if int(data[0])==187 and int(data[2]) == 170 and data[1]<50 and data[3]<50:

    f = open("left.txt","w+")

    # print("left")
The relevant code within DSTR.py can be seen above. In each if statement, a unique file is created which will be searched for by the eduMIP in order to adjust its controller.
Step 3: Setting Up rc_balance.c on the eduMIP
Once the DSTR app is working, it’s time to implement the modified version of rc_balance. The code can be found in rc_balance.c attached below. The most relevant code is given below.
case DSTR

    FILE *file;

    if ((file = fopen("/var/lib/cloud9/BBBlue_DSTR/up.txt.", "r")))

    {

        remove(file);

        setpoint.phi_dot = 2;

    }

    if ((file = fopen("/var/lib/cloud9/BBBlue_DSTR/down.txt.", "r")))

    {

        remove(file);

        setpoint.phi_dot = -2;

    }

    if ((file = fopen("/var/lib/cloud9/BBBlue_DSTR/right.txt.", "r")))

    {

        remove(file);

        setpoint.gamma_dot = 2;

    }

    if ((file = fopen("/var/lib/cloud9/BBBlue_DSTR/left.txt.", "r")))

    {

        remove(file);

        setpoint.gamma_dot = 2;

    }

    continue;
As you can see, each if statement checks for the existence of a file with the appropriate name. If found, that file is first deleted and then the corresponding value within the balance controller is adjusted. The two values modified, setpoint.phi_dot and setpoint.gamma_dot are reference values used to adjust the eduMIP’s forward/backward motion and turning motion. The values here can be adjusted to change how slow or fast the eduMIP moves, but keep in mind that the controller has some limit to how fast it can make the robot move.
Note: Make sure the directory used in the if statements here is adjusted to the location of your DSTR.py file.
Step 4: Run on Boot and Enjoy!
In order to test the DSTR controlled eduMIP, make within the Robotics Cape library and run rc_balance simultaneously with DSTR.py. Once any bugs have been corrected, we are ready to set up on boot.
Create a shell file (.sh) with the following line of code.
python3 /full-path DSTR.py
Now, use the terminal to run the next section of code in order to make the eduMIP run rc_balance and DSTR.py on boot. In this case, <code> refers to path directories for the.sh file and the rc_balance executable.
mkdir logs

sudo crontab -e

@reboot sh <code>/filename.sh > <code>/logs/cronlog 2>&1

@reboot <code>/rc_balance > <code>/logs/cronlog 2>&1
Comments are not currently available for this post.