Categories: Intermediate
Background
Most of the project set up can be found TI’s official
Resource Explorer guide for Zigbee Linux Gateway Project Zero
. For bugs along the way, I referenced the
E2E forums
to get quick answers from developers who have worked with the hardware.
By the end of this guide, you should be able to familiarize yourself with TI hardware and the workflow, bring up a Zigbee Linux Gateway Application, and control an end device remotely from the Sensor-to-Cloud web application. I focus on 3 main applications – controlling a light, door lock, and reading temperature. (Note, it is recommended to have another LPSTK in the Zigbee network to act as the thermostat coordinating with the temperature). It is expected that the reader references the guide linked in parallel for more detailed steps as I summarize most of the steps and point out potential bugs that I ran into.
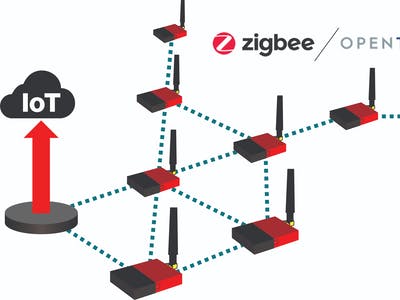
TI’s Zigbee 3.0 Linux Gateway offers pre-built application firmware images to use upon download and documentation to explain the different interfaces. On the user end, the main ways to interact digitally are through the Local Sample Application accessible from the terminal (SSH’ing to the gateway on the BeagleBone), and the Node.js Web Application. On the Zigbee end, a minimal network involves a Zigbee Coordinator (hooked up to the BeagleBone gateway) and a Zigbee End Device (ZED) to interact with the application. We specifically use the BeagleBone as the gateway device that runs the applications and hosts the web application, LAUNCHXL-CC1352R1 as the Zigbee Network Processor communicating with the ZED and gateway via UART/USB, and the LPSTK-CC1352R as the ZED.
We choose the Z-stack as it supports ultra-low power, long-range, and Sub-1GHz range, mesh networks inherently but there are other stacks to choose from.
The CC13x2 devices are well established and documented. The LPSTK features integrated sensors like Humidity, LED’s, temperature, hall effect, and pre-programmed BLE functionality that can be paired using the SensorTag mobile app.
Prerequisites
You should already have the listed hardware and software installed.
Notes about the software:
- VS Code is
optional
but I found it helpful to dig into the code when I needed to see which line number the configuration option was, or to understand how to better customize the sample application given. - Uniflash is
preferred
for flashing pre-built binaries/hexes onto the device (both Launchpad and LPSTK). - Code Composer Studio is
required
for building the project and flashing onto the devices - Wireshark packet sniffer is
optional
but recommended to debug problems in the Zigbee network if a device is not responding or has difficulties connecting. - PuTTy is a good SSH application on Windows for communicating with the gateway and opening the GUI.
- SimpleLink CC13x2 v 4.40.04.04 SDK
required
for accessing sample applications - Balena Etcher
required
for loading image onto SD card for BeagleBone to boot off of - WinSCP
required
for transferring Gateway files to BeagleBone
Task 1: Programming the devices
1. First, flash the Zigbee Network Processor (ZNP) onto the LAUNCHXL using UniFlash (refer to the original guide)
2. Next, using Code Composer Studio, import the project folder from the SimpleLink SDK inside examples/rtos/CC1352R1_LAUNCHXL/zstack zed_(light, temperaturesensor, doorlock). This contains all of the source code for the end device and can be built immediately.
- Flashing onto the LPSTK can be a little tricky. Remember to remove jumpers before flashing to the LPSTK and reattach when done programming. Ensure that in the SysConfig file, Channel 13 is checked under Z-stack -> Radio -> Primary Channels. Channel 11 is used as default but the servers communicate on Channel 13.
3. Download Buster IoT (without graphical desktop) (AM3358 Debian 10.3 2020-04-06 4 GB SD IoT) and use Balena Etcher to load the image onto your SD card connected by a USB adapter.
Task 2: Initializing and starting the servers
4. Copy Zigbee Gateway installation files (C:\ti\Zigbee_3_0_Linux_Gatway_1_0_1) and copy into Beaglebone’s home directory. Follow steps on the guide to start the SFTP session.
5. Connect the launchpad to the Beaglebone using a USB to miniUSB cable and verify that it shows up in the device tree
ls -l /dev/ttyACM*
6. Connect to the BeagleBone over SSH and run the setup scripts to compile the server source code and start the servers. You should be able to load a web page using the BeagleBone’s IP address shortly. (
Bug
I encountered: if you are stuck on Phase 1: SoC failed to initialize, set SOC_RESET_REQUIRED=0 in the zigbeeHAgw script).
Task 3: Introduce Zigbee End Device
7. Now that the sensortag has the end device firmware loaded, you can simply turn it on and press BTN 1 to initiate the Finding / Binding process. If you launch the custom application on the Beaglebone terminal, you should be able to see the end device added to the device list. (If not, ensure that the sensortag firmware is using channel 13 in SysConfig. If that doesn’t work, post Wireshark sniffer logs onto the forums for additional help).
8. Everything should be set up and a new device card should be added to the web application. Try toggling the light on and off and use the slider to adjust color and transition time settings! Welcome to your first smart light setup!
Video Demo!
Closing Remarks
I hope this short post was enough to get you started – once you master these examples, feel free to substitute for more practical Zigbee devices like the Philips Wiretap Hue and Honeywell products! You may have to tinker around with the firmware to make it compatible but there is plenty of documentation on TI’s Resource Explorer to help you out!
Comments are not currently available for this post.