Categories: Beginner
I’m a newbie to Linux, and wanted a short intro project to gain some familiarity. I followed
this step-by-step tutorial
from Octavo Systems to make my Magic 8 Ball. It was fairly straightforward to follow; even installing a Linux image on my PocketBeagle was not hard when I followed the
PocketBeagle System Reference Manual
linked in the tutorial. Connecting the board via Cloud9 IDE was also much easier than I expected to be. As you can see in the video below, my Magic 8 Ball works great!
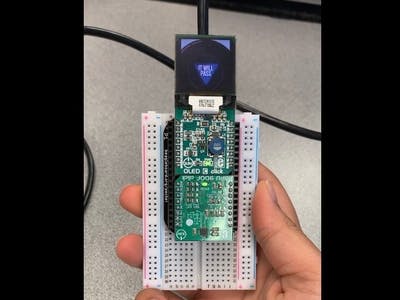
BeagleBoard.org® Po
cketBeagle® (pictured below) headers conform to the MikroBUS™ standard and allow for two click boards™ to be interfaced with PocketBeagle® at a time (shown in the following figure). Although no guarantees are made with respect to compatibility, most click boards™ work with PocketBeagle® with a little bit of effort.
I have one note – simply invoking the device tree overlays is not possible because the one for the MPU assumes the wrong I2C address, and will need to be updated. For simplicity’s sake, I ended up downloading both the binaries provided in the tutorial, and edited the one for the MPU. This is what I did:
I first dragged and dropped the overlays into my Cloud9 directory and then used the following commands:
I got the source code:
git clone https://github.com/beagleboard/bb.org-overlays
I got the drivers:
cd bb.org-overlays/src/arm
To update the I2C address I went to the source code using this command:
nano PB-I2C2-MPU-9DOF-CLICK.dts
I saw this:
reg = <0x68>
Which I changed to 0x69, and exited using Ctrl-X.
I next recompiled the binary driver and then copied the binary file over to the firmware directory:
sudo cp src/arm/PB-I2C2-MPU-9DOF-CLICK.dtbo /lib/firmware/
Finally, I rebooted.
sudo reboot
Note that the password for debian is temppwd.
After this, I proceeded to invoke the overlays as per normal and then continued.
By following this tutorial, I was able to meet my goal of learning more about programming a microprocessor using an Embedded Linux system. Being guided step-by-step ensured that I actually understood the commands that I was using, as opposed to just following them.
I was even able to follow the extension and enable AutoBoot, and now I can have my Magic 8 Ball up and running simply by powering it up through USB. I’m never going to sweat a decision again!
Comments are not currently available for this post.