Hello everyone. It’s been a while since my last post. Instead of doing the normal weekly update, I have decided to try writing something a bit more in-depth. Recently, I have been successful in publishing BeagleBoard Rust Imager to Flathub. So I thought it might be best to go over the development and publishing process.
Why Flatpak?
Flatpak is a cross-distribution packaging format for Linux. It aims to solve the fragmentation of Linux packaging for GUI (and sometimes terminal) applications. However, it is important to note that it doesn’t really replace the distribution packages since many low-level packages cannot be packaged as Flatpak. For more information, check out Flatpak Documentation.
I have been using Fedora Sway Atomic for a while now. Being an immutable distribution, I prefer using Flatpaks instead of installing things on the base image using rpm-ostree. Additionally, I already have some experience with Flatpaks due to being a maintainer of Zola flatpak. So, it felt like a good idea to start distributing BeagleBoard Rust Imager as a flatpak.
Being on Flathub might also help attract more people to the project, so that’s a bonus.
Install from Flathub
While the main goal of the post is to build the Flatpak locally, it is important to note that anyone not trying to do development should just use the builds available on Flathub.
flatpak install flathub org.beagleboard.imagingutilityBasics of Packaging Rust Applications as Flatpak
Let’s go over the basics of what is required to build a Flatpak package for Rust applications.
Dependencies
The build step on Flathub does not have access to the internet. This is a problem because it means we cannot download dependencies from crates.io during the build process. Depending on the level of access to the main project, I have found two ways to package Rust applications as Flatpak.
Create dependency list from Cargo.lock
This method involves creating a list of crates.io dependencies ahead of time, which allows the flatpak builder to download them. This can be done using the scripts provided in the flatpak-builder-tools.
The upsides to this approach are that it does not need any changes to the upstream repo. Thus, it is useful when the package is being created by someone other than the original developers.
However, the dependency list needs to be updated for every new release. Flatpak has some bots that allow watching for new releases in a repository. If used properly, these bots will also create PRs, thus automating the whole update process. However, due to the requirement to regenerate the dependency list, the process now requires manual changes from the Flatpak maintainer.
Use cargo vendor
This is the method I am using for BeagleBoard Rust Imager. Simply put, it uses the cargo vendor command to create a local copy of the dependencies, which is then released as part of the normal release. These vendored dependencies are then downloaded in the flatpak build process and are used for the dependencies instead of downloading them from crates.io.
Since I am the author of BeagleBoard Rust Imager, adding vendored dependencies to the release was not a problem. So I went this route. For every release, I am now building a tar.gz for vendored dependencies.
Files
Let’s now go over the main files involved in building the Flatpak.
Metinfo File
The Metinfo file contains all the information that is shown on the Flathub page for the application. It includes things like various URLs related to the project, screenshots, etc. Here is the metainfo file at the time of writing this blog:
<?xml version="1.0" encoding="utf-8"?>
<component type="desktop-application">
<id>org.beagleboard.imagingutility</id>
<name>BeagleBoard Imager</name>
<summary>BeagleBoard Imaging Utility</summary>
<developer id="org.beagleboard">
<name>BeagleBoard.org Developers</name>
</developer>
<metadata_license>CC0-1.0</metadata_license>
<project_license>MIT</project_license>
<description>
<p>
Notice: Please download the udev permissions for fixing permission errors when working with BeagleConnect Freedom.
</p>
<p>
The easiest way to install the latest operating system images for your Beagle.
</p>
</description>
<launchable type="desktop-id">org.beagleboard.imagingutility.desktop</launchable>
<branding>
<color type="primary" scheme_preference="light">#aa5137</color>
<color type="primary" scheme_preference="dark">#aa5137</color>
</branding>
<categories>
<category>Development</category>
</categories>
<url type="homepage">https://www.beagleboard.org/bb-imager</url>
<url type="bugtracker">https://github.com/beagleboard/bb-imager-rs/issues</url>
<url type="donation">https://github.com/sponsors/beagleboard</url>
<url type="contact">https://www.beagleboard.org/collaborate</url>
<url type="contribute">https://github.com/beagleboard/bb-imager-rs/blob/main/CONTRIBUTING.md</url>
<url type="vcs-browser">https://github.com/beagleboard/bb-imager-rs</url>
<content_rating type="oars-1.1" />
<screenshots>
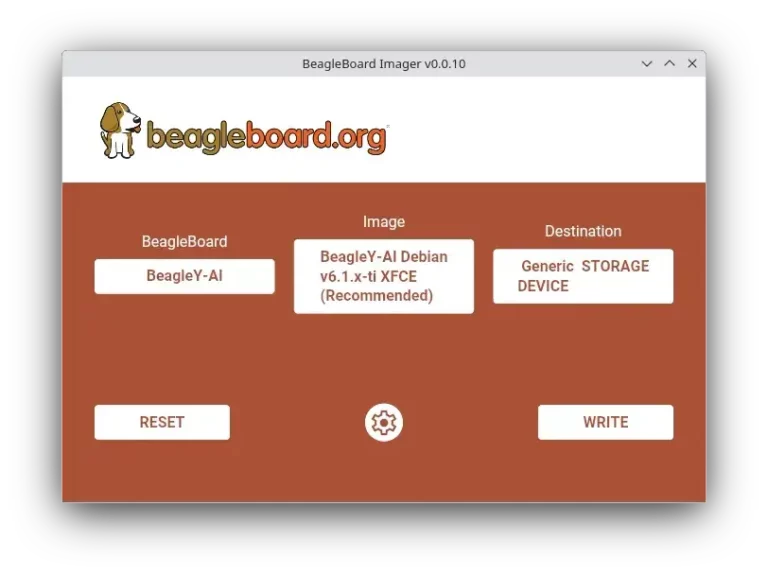
<screenshot type="default">
<image>https://media.githubusercontent.com/media/beagleboard/bb-imager-rs/refs/tags/v0.0.11/assets/screenshots/home.webp</image>
<caption>Home</caption>
</screenshot>
<screenshot>
<image>https://media.githubusercontent.com/media/beagleboard/bb-imager-rs/refs/tags/v0.0.11/assets/screenshots/config.webp</image>
<caption>Image customization</caption>
</screenshot>
<screenshot>
<image>https://media.githubusercontent.com/media/beagleboard/bb-imager-rs/refs/tags/v0.0.11/assets/screenshots/flash.webp</image>
<caption>Flashing progress</caption>
</screenshot>
</screenshots>
<releases>
<release version="0.0.10" date="2025-07-05">
<url>https://github.com/beagleboard/bb-imager-rs/releases/tag/v0.0.10</url>
</release>
<release version="0.0.9" date="2025-07-04">
<url>https://github.com/beagleboard/bb-imager-rs/releases/tag/v0.0.9</url>
</release>
<release version="0.0.8" date="2025-06-26">
<url>https://github.com/beagleboard/bb-imager-rs/releases/tag/v0.0.8</url>
</release>
</releases>
</component>Check out the Flathub metainfo guidelines for details regarding the metainfo file. This file currently lives in the bb-imager-rs repo.
Flatpak Manifest
The manifest file describes how to build the Flatpak. Let’s look at the manifest file at the time of writing this post:
id: org.beagleboard.imagingutility
runtime: org.freedesktop.Platform
runtime-version: '24.08'
sdk: org.freedesktop.Sdk
sdk-extensions:
  - org.freedesktop.Sdk.Extension.rust-stable
command: bb-imager-gui

build-options:
  append-path: /usr/lib/sdk/rust-stable/bin
  env:
    CARGO_HOME: /run/build/bb-imager-gui/cargo

finish-args:
  - --share=ipc
  - --share=network
  - --socket=wayland
  - --socket=fallback-x11
  # SD Card permissions
  - --system-talk-name=org.freedesktop.UDisks2
  # BeagleConnect Freedom
  - --device=all

modules:
  - name: bb-imager-gui
    buildsystem: simple
    build-commands:
      - cargo --offline fetch --verbose --manifest-path bb-imager-gui/Cargo.toml
      - cargo --offline build --release --verbose -p bb-imager-gui -F bcf_cc1352p7
        -F bcf_msp430
      - install -Dm755 ./target/release/bb-imager-gui -t /app/bin/
      - install -Dm644 ./bb-imager-gui/assets/packages/linux/BeagleBoardImager.desktop
        /app/share/applications/${FLATPAK_ID}.desktop
      - desktop-file-edit --set-icon=${FLATPAK_ID} /app/share/applications/${FLATPAK_ID}.desktop
      - install -Dm644 ./bb-imager-gui/assets/icons/icon.png /app/share/icons/hicolor/128x128/apps/${FLATPAK_ID}.png
      - install -Dm644 ./bb-imager-gui/assets/packages/linux/flatpak/org.beagleboard.imagingutility.metainfo.xml
        $FLATPAK_DEST/share/metainfo/${FLATPAK_ID}.metainfo.xml
    sources:
      - type: archive
        url: https://github.com/beagleboard/bb-imager-rs/archive/refs/tags/v0.0.10.tar.gz
        sha256: 485fe37fe8c75946efb4b6e36afc0f20a5aac8dcf47549dc43a4298fbae231cd
        x-checker-data:
          type: json
          url: https://api.github.com/repos/beagleboard/bb-imager-rs/releases/latest
          version-query: .tag_name | sub("^v"; "")
          url-query: '@uri "https://github.com/beagleboard/bb-imager-rs/archive/refs/tags/\(.tag_name).tar.gz"'
          timestamp-query: .published_at
      - type: archive
        url: https://github.com/beagleboard/bb-imager-rs/releases/download/v0.0.10/cargo-vendor.tar.gz
        sha256: 0aee5838110c46d2409adf32a8319581418758fb48dd70faf7d5b463e428f438
        dest: vendor
        x-checker-data:
          type: json
          url: https://api.github.com/repos/beagleboard/bb-imager-rs/releases/latest
          version-query: .tag_name | sub("^v"; "")
          url-query: '@uri "https://github.com/beagleboard/bb-imager-rs/releases/download/\(.tag_name)/cargo-vendor.tar.gz"'
          timestamp-query: .published_at
      - type: file
        path: config.toml
        dest: .cargo/
The Rust-specific things to note here are the following:
It is using 3 files: the source tarball, the vendored dependencies tarball, and a cargo config file. The config file is basically there to tell Cargo to use a local folder for dependency resolution instead of trying to download from crates.io.
The x-checker-data is for Flatpak external data checker. It can be used to automatically check for updates to external sources in the Flatpak manifest. This allows us to automate updates since the checker will create the PR for us when it detects a new release.
Building the Package Locally
Now we have a basic idea regarding all the files involved, let’s build and test the flatpak locally.
- The first tool we need is flatpak-builder. I like installing it as a flatpak, but it is also possible to install it from the distribution repos.
flatpak install org.flatpak.Builder- Clone the repository
git clone https://github.com/flathub/org.beagleboard.imagingutility.git
cd org.beagleboard.imagingutility- Build and install the Flatpak.
flatpak run org.flatpak.Builder --force-clean --user --repo=repo --install builddir org.beagleboard.imagingutility.yamlIt should now be installed as a flatpak in the system for the current user. Go ahead and test things.
Ending Thoughts
That is all for this post. Hopefully, this helps other people understand how to build and test Flatpak locally.